Hướng dẫn cảm biến nhiệt độ DS18B20 Arduino
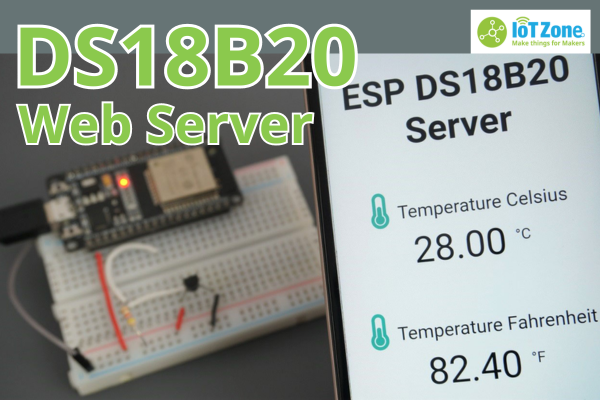
Trong bài viết này, IoTZone sẽ hướng dẫn bạn cách làm việc với cảm biến nhiệt độ DS18B20 Arduino một cách đơn giản. Chúng ta sẽ kết nối phần cứng, cài thư viện cảm biến, lập trình để đọc thông tin từ một hoặc nhiều cảm biến nhiệt độ DS18B20 khác nhau. Cùng tìm hiểu nhé!
Mục lục bài viết
ToggleGiới thiệu về cảm biến nhiệt độ DS18B20
Cảm biến nhiệt độ DS18B20 là cảm biến kỹ thuật số 1 dây, đồng nghĩa với việc chúng chỉ dùng 1 dòng dữ liệu (kèm theo GND) để gửi và nhận dữ liệu với mạch ESP32.
Bạn có thể cấp nguồn cho cảm biến này bằng nguồn điện bên ngoài hoặc lấy trực tiếp từ ESP32 thông qua dây truyền dữ liệu, giúp việc kêt nối phần cứng được đơn giản hơn.

Mỗi một cảm biến nhiệt độ DS18B20 đều có 1 mã nối tiêp 64bit riêng biệt, cho phép chúng ta có thể kết nối nhiều cảm biến tại cùng 1 dây dữ liệu để đo thông tin từ nhiều cảm biến khác nhau. Khi đó, bạn có thể dùng 1 chân GPIO để kết nối với nhiều cảm biến nhiệt độ khác nhau.
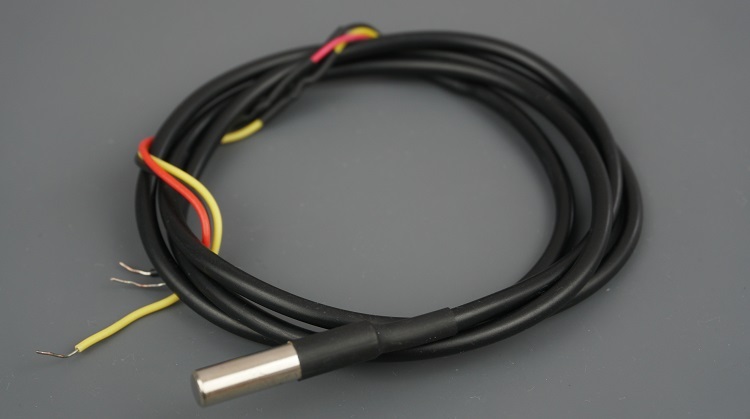
Nếu muốn đo nhiệt độ của nước, bạn có thể sử dụng cảm biến DS18B20 ở phiên bản chống nước như hình:
Thông số kỹ thuật của cảm biến nhiệt độ DS18B20:
- Giao tiếp qua cổng kết nối bus 1 dây
- Nguồn cấp: 3V – 5.5V
- Nhiệt độ đo được: Khoảng từ -55 độ C đến 125 độ C
- Sai số +/- 0,5 độ C (với nhiệt độ trong khoảng -10 độ C đến 85 độ C)
Chuẩn bị
- Mạch ESP32
- Cảm biến nhiệt độ DS18B20
- Điện trở 4,7k Ohm
- Dây Jumper
- Breadboard
Sơ đồ kết nối
Như đã giới thiệu, bạn có thể thoải mái cấp nguồn cho cảm biến nhiệt độ DS18B20 thông qua chân VDD (ở chế độ Normal) hoặc cấp nguồn từ chân truyền dữ liệu (ở chế độ ký sinh – Parasite).
Bạn có thể chọn một trong 2 chế độ tùy thích, dưới đây là sơ đồ kết nối cho từng chế độ:
Chế độ ký sinh
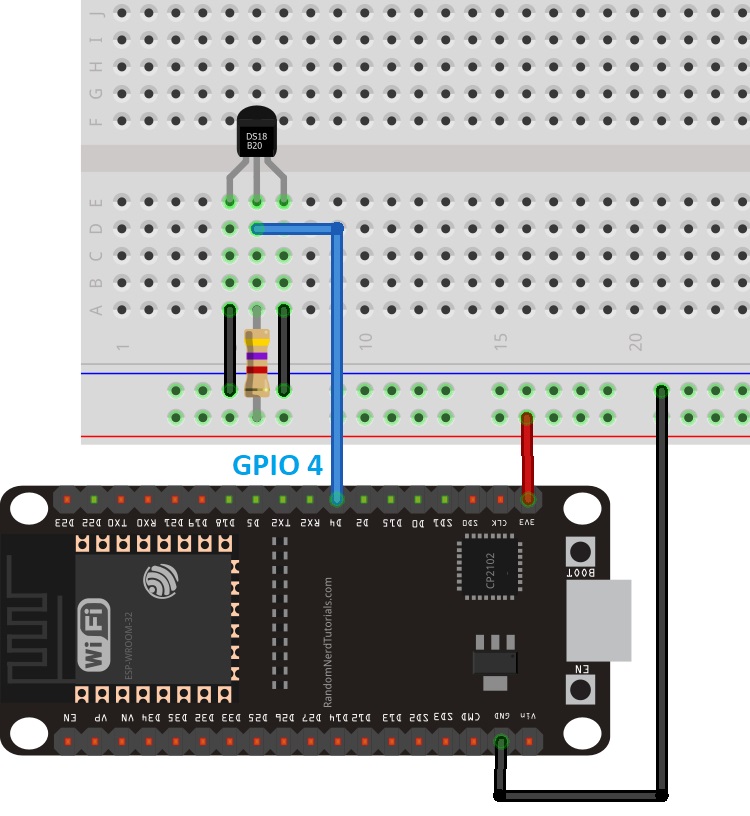
Chế độ bình thường

Cài đặt thư viện
Để điều khiển cảm biến nhiệt độ DS18B20 Arduino, bạn cần cài thư viện One Wire (by Paul Stoffregen) và thư viện Dallas temperature library).
Bạn hãy truy cập vào Sketch >> Include Library >> Manage Libraries, lần lượt gõ tên 2 thư viện trên và cài đặt bình thường vào Arduino IDE của mình nhé.
Nạp chương trình đo nhiệt độ từ 1 cảm biến nhiệt độ DS18B20 Arduino
Sau khi cài đặt thư viện, bạn có thể upload đoạn code bên dưới vào cảm biến nhiệt độ DS18B20 Arduino để đọc thông tin nhiệt độ từ cảm biến và hiển thị lên màn hình Serial Monitor:
#include <OneWire.h>
#include <DallasTemperature.h>

// GPIO where the DS18B20 is connected to
const int oneWireBus = 4;

// Setup a oneWire instance to communicate with any OneWire devices
OneWire oneWire(oneWireBus);

// Pass our oneWire reference to Dallas Temperature sensor
DallasTemperature sensors(&oneWire);

void setup() {
  // Start the Serial Monitor
  Serial.begin(115200);
  // Start the DS18B20 sensor
  sensors.begin();
}

void loop() {
  sensors.requestTemperatures();
  float temperatureC = sensors.getTempCByIndex(0);
  float temperatureF = sensors.getTempFByIndex(0);
  Serial.print(temperatureC);
  Serial.println("ºC");
  Serial.print(temperatureF);
  Serial.println("ºF");
  delay(5000);
}
Trên thực tế thì sẽ có khá nhiều cách để chúng ta có thể đọc được nhiệt độ từ cảm biến nhiệt độ DS18B20 Arduino. Tuy nhiên, nếu bạn chỉ có nhu cầu đo nhiệt độ từ 1 cảm biến DS18B20 duy nhất thì đây là cách làm đơn giản và nhanh nhất.
Giải thích chương trình
Khai báo thư viện OneWire và DallasTemperature:
#include <OneWire.h>
#include <DallasTemperature.h>
Khai báo chân kết nối của cảm biến nhiệt độ DS18B20 Arduino với ESP32, ở đây mình đang dùng chân GPIO 4. Tạo các phiên bản cần thiết cho cảm biến:
// GPIO where the DS18B20 is connected to
const int oneWireBus = 4;

// Setup a oneWire instance to communicate with any OneWire devices
OneWire oneWire(oneWireBus);

// Pass our oneWire reference to Dallas Temperature sensor
DallasTemperature sensors(&oneWire);
Trong setting(), tạo một Serial Monitor ở tốc độ 115200:
Serial.begin(115200);
Khởi tạo cảm biến nhiệt độ DS18B20 Arduino:
sensors.begin();
Gọi hàm sau trước khi nhận được thông tin nhiệt độ thực tế:
sensors.requestTemperatures();
Gọi hàm để lấy thông tin nhiệt độ là độ C:
float temperatureC = sensors.getTempCByIndex(0);
Gọi hàm sau nếu bạn cần lấy thông tin nhiệt độ là độ F:
float temperatureF = sensors.getTempFByIndex(0);
Trong 2 hàm lấy thông tin độ C, độ F trên, vì mình chỉ đo nhiệt độ từ 1 cảm biến DS18B20 duy nhất nên đối số ở đây là 0. Nếu bạn muốn đọc nhiệt độ của nhiều cảm biến thì hãy thay thế đối số này nhé! Ví dụ: Khi đọc nhiệt độ từ 2 cảm biến DS18B20 thì đối số là 1, và tương tự cho số lượng khác.
In kết quả ra màn hình Serial:
Serial.print(temperatureC);
Serial.println("ºC");
Serial.print(temperatureF);
Serial.println("ºF");
Yêu cầu sau mỗi 5 giây sẽ cập nhật nhiệt độ 1 lần:
delay(5000);
Kết quả
Sau khi upload code vào mạch ESP32, bạn có thể thấy kết quả nhiệt độ được in ra màn hình Serial như sau:

Đo nhiệt độ từ nhiều cảm biến nhiệt độ DS18B20 Arduino
Vì mỗi cảm biến nhiệt độ DS18B20 Arduino đều có 1 mã 64 bit duy nhất, nên chúng ta có thể đo nhiệt độ từ nhiều cảm biến DS18B20 khác nhau. Cùng tìm hiểu về hướng dẫn DS18B20 này nhé!
Trước tiên, bạn cần nối các cảm biến với nhau theo như sơ đồ:

Nạp chương trình
#include <OneWire.h>
#include <DallasTemperature.h>

// Data wire is plugged TO GPIO 4
#define ONE_WIRE_BUS 4

// Setup a oneWire instance to communicate with any OneWire devices (not just Maxim/Dallas temperature ICs)
OneWire oneWire(ONE_WIRE_BUS);

// Pass our oneWire reference to Dallas Temperature.
DallasTemperature sensors(&oneWire);

// Number of temperature devices found
int numberOfDevices;

// We'll use this variable to store a found device address
DeviceAddress tempDeviceAddress;

void setup(){
  // start serial port
  Serial.begin(115200);

  // Start up the library
  sensors.begin();

  // Grab a count of devices on the wire
  numberOfDevices = sensors.getDeviceCount();

  // locate devices on the bus
  Serial.print("Locating devices...");
  Serial.print("Found ");
  Serial.print(numberOfDevices, DEC);
  Serial.println(" devices.");

  // Loop through each device, print out address
  for(int i=0;i<numberOfDevices; i++){
    // Search the wire for address
    if(sensors.getAddress(tempDeviceAddress, i)){
      Serial.print("Found device ");
      Serial.print(i, DEC);
      Serial.print(" with address: ");
      printAddress(tempDeviceAddress);
      Serial.println();
    } else {
      Serial.print("Found ghost device at ");
      Serial.print(i, DEC);
      Serial.print(" but could not detect address. Check power and cabling");
    }
  }
}

void loop(){
  sensors.requestTemperatures(); // Send the command to get temperatures

  // Loop through each device, print out temperature data
  for(int i=0;i<numberOfDevices; i++){
    // Search the wire for address
    if(sensors.getAddress(tempDeviceAddress, i)){
      // Output the device ID
      Serial.print("Temperature for device: ");
      Serial.println(i,DEC);
      // Print the data
      float tempC = sensors.getTempC(tempDeviceAddress);
      Serial.print("Temp C: ");
      Serial.print(tempC);
      Serial.print(" Temp F: ");
      Serial.println(DallasTemperature::toFahrenheit(tempC)); // Converts tempC to Fahrenheit
    }
  }
  delay(5000);
}

// function to print a device address
void printAddress(DeviceAddress deviceAddress) {
  for (uint8_t i = 0; i < 8; i++){
    if (deviceAddress[i] < 16) Serial.print("0");
      Serial.print(deviceAddress[i], HEX);
  }
}
Kết quả
Như trong đoạn code trên, mình sử dụng 3 cảm biến nhiệt độ khác nhau. Vì thế, kết quả trên Serial sẽ như sau:

Lời kết
Trên đây là nội dung hướng dẫn DS18B20 chi tiết, bao gồm cả cách đo nhiệt độ từ 1 cảm biến duy nhất cho đến cách đo nhiệt độ từ nhiều cảm biến nhiệt độ DS18B20 Arduino khác nhau. Chúc các bạn thành công!
Ngoài ra, IoTZone cũng có xây dựng nhiều bài hướng dẫn với các module khác, bạn có thể tham khảo nếu thích:

